My grandmother is 74 years old. Her name is Tamil Arasi. The meaning of 'Queen' in Tamil language is 'Arasi'. Thus, we have written 'Tamil Queen' on the birthday cake. It's nothing but the mere English translation of her name. Lol!
She hasn't cut a birthday cake even once in her life. Birthdays are just as normal as other days. Not just because of Corona, but my grandmother simply doesn't like buying cakes from the bakery. So my sister and I planned to make a cake at our home. Here is the result.
How's it? Looking Colourful? Tell us in the comment box!
We made our family members happy, surprised, and satisfied by making this birthday cake. You can also get the chance to impress the birthday baby by following the instructions below.
Ingredients
- 1 cup Maida
- 1/2 cup Powdered Sugar
- 1/4 cup Refined oil or palm oil
- 1 teaspoon Baking powder
- 1/2 teaspoon Baking soda
- 1/3 cup Milk
- Chocolate sauce (required amount)
- 1/2 teaspoon Vanilla essence
Instructions
 |
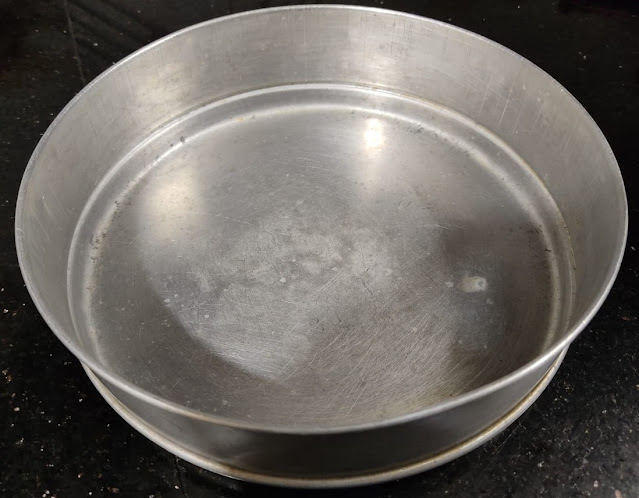
| Aluminum Cake Tray |
Step-by-Step Making Process
1. Take a cake baking tray. If you don't have this tray, if you have any other aluminum tray as given in the image above, you can use it. Grease the tray with melted butter and dust it with flour or line a parchment paper (Also known as baking paper or butter sheet) after that, put it aside.
2. Add some amount of sand to a pressure cooker and spread it evenly. Sand prevents the cake from overcooking. Put a plate inside the cooker and cover the sand properly. (This should be set in a way that the cake doesn't spoil because of sand) Place a ring-type small stand over the plate. Remove the gasket and weight and just cover the cooker with the led. Switch on the stove now and let it heat for a few minutes on a low flame. It's known as a pre-heating process.
3. Put 1/2 cup of powdered sugar in a big bowl. Don't take normal sugar, powdered sugar is always better to use for the cake. Also take a big bowl, so that you can easily mix the batter.
4. In that powdered sugar, mix 1/4 cup of oil well by using a whisk. (You can also add some extra spoons of oil if you wish) Add 1 cup of maida, 1 teaspoon of baking powder, 1/2 teaspoon of baking soda and 1/4 cup of oil and mix them well for a minute. Don't panic if lumps formed at this stage. Add 1/3 cup of milk and mix it well and make it as a paste. Whisk without any lumps. It will take 5-8 minutes to make it. If you still didn't get lumps-free batter, mix it for a few more minutes. Add vanilla essence and mix well. The batter is ready now.
5. Pour the batter onto the cake tray. Tap the tray to avoid air bubbles.
6. Now open the cooker and place the cake tray carefully inside the cooker. Without the gasket and whistles, cover the cooker and cook it for 45 minutes on low flame. After 45 minutes, take the cake out and let it cool for 10 minutes. By this time we can make the whipping cream.
Ingredients for whipping cream
- 4 tablespoon Milk
- 1 1/2 tablespoon Cornflour
1. Put 4 tablespoons of milk into a small pan and let it heat for 30 seconds. Add cornflour into this and mix it well. After a minute, it will become like a thick paste. Whipping cream is now ready.
2. Once this whipping cream cools down, put it inside the polythene packet and make it as cone shape by putting a rubber band on the top. At the corner of the cone put a small hole by cutting it down with a scissor. Keep this aside.
Now let's come to the cake again
7. After the cake cools down, apply the chocolate sauce everywhere on the cake. Take the whipping cream that we made and write your loved one's name and a happy birthday message as you want.
8. Put the cake in the freezer for an hour and it will be ready to serve. We have just decorrated this with gems to make it more colorful. Anyways, It's a choice.
We are happy to share this recipe with you all. Make your loved one's birthday even more special with your home-made cake. Cheers!


Nice am gonna try it!!!
ReplyDeleteThat's nice. Share your experience after making it...
DeleteNice try
ReplyDeleteThank you
Deleteஅருமை
ReplyDeleteமிக்க நன்றி சார்
DeleteYummmyyyyyyy ☺☺☺
ReplyDeleteTry it...You will love it
Delete🔥❤️
ReplyDeletePost a Comment